So people asked me when I started
this passion to cook and bake,
well to be honest bake was only about
a month ago?
But for *cooking*,
it was wayyy back in 2006.
Not the best of *recipes* back then,
as the only improvisation i did
was to either clean up the fridge,
easy washing up and cooking/ prepping fast
because you would need the extra time
to study, do your coursework
and of course head out for drinks.
But i think things turned for the better,
with the prep of the wedding in Sept
and my father-in-law was diagnosed
with cancer earlier this year,
we decided its time to change things up.
So by cutting down carbs, salt, oil, sugar, dairy
and processed food (eg: canned food, chips, store-made sausages etc),
together with my annual *vegetarian month*
for the ghost festival that is a family tradition,
I started trying new things with trial and error
to excite the palate and our diet.
Now these recipes below,
requires a food processor.
I just bought mine about a month ago
and its the best thing Ive ever bought to date,
as it makes things faster
and easier for my tiny lil kitchen!
So here are just some of my
homemade to enjoy!
Happy cooking! x
******
Homemade milk. (Cashew Milk)

Now as i mentioned,
we tried to cut down on dairy
when we learned my father-in-law
was diagnosed with cancer,
because in some cancer research articles,
it was said that cancer cells actually feed
on sugar and dairy.
We dont know how true these articles are
but its always best to stick to healthier options
and to remember that moderation is key.

Ingredients are simple:
Cashew nuts 100g
Water 200ml
That't it.
Of course theres the option of:
- Cinnamon
- Honey
But me and the boy felt no need of those
as we were going to drink them in our cereal,
which already has sugar in them.
This recipe will make about 125ml approx of cashew milk
and it will taste a lil like soy milk (but more diluted).


Methods:
1) Pour both water and cashew nuts
into a food processor and blend them
until its white and milky.

Then sieve them out
into a jar or container
until ready to be served!
Easy as 1,2,3!


The milk will last in an
air-tight container in the fridge
for about 3 days
and you can add them to your oats,
cereal, or even your homemade curry!
******
Homemade Pesto. (slightly healthier version- dairy free!)

Ever since i was introduced to pesto
when i was England,
it was my go-to easy food
whenever i was in a hurry.
What i love about pesto,
is that you can eat it warm or cold
with your pasta or meat in an instant
BUT i know pre-packed pesto can be really high
in oil and cheese,
which will definitely send your calories
sky rocketing through the roof!
So I did tweaks to this recipe
I got off the internet and this is my version
of a spinach and toasted walnut pesto.

Ingredients:
Spinach (approx 75g)
Walnuts (45g)
Extra virgin Olive oil (1/4 cup) - may choose to add more for a more liquid texture.
Pinch of Salt
Pinch of Pepper
*Feel free to add lemon juice for a more citrus flavour. I omitted this.

Methods:
1) Toast your walnuts in an oven at about 180C for 5 mins.
2) Combine the walnuts, spinach (chopped up roughly), salt, pepper
and olive oil into the food processor and blend.
3) You might need to stop and scrape the sides a few times
and then blend again to get it smooth.
Or you can choose to leave it chunky as well. Like I did. :)

4) When you're done, just transfer it to a air-tight container
with a cling wrap over the top. This will ensure it to last fresher.
It should serve about 4 pax
and can last in the fridge for about 3 days.

I served mine with Farfalle pasta
and some shredded turkey ham!
(yes i know we cheated with the ham
but its okay to have an 'off' day! haha!)
And the boy loves it
that he wanted a second bowl!

So there my version of a no-cheese pesto sauce
with little oil and lots of greens!
You can choose to swap the spinach with
coriander or basil leaves;
and switching walnuts with pine nuts or almonds!
Love, love, love this! x
******
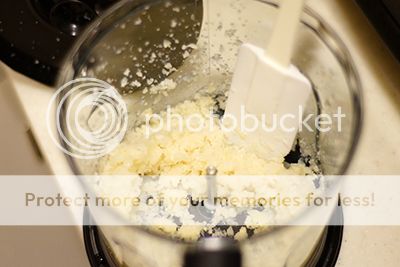
Homemade Cauliflower Rice.
Now i cant take credit for this
as *Sorted Food*, *Jamie Oliver*
and loads more others that have done this before.
I admit I was pretty skeptical about it at first
but its surprisingly good!
So instead of having rice (carbs),
how about another alternative
that actually looks like rice! haha!
Ingredients:
Cauliflower
Pinch of Salt

Methods:
1) Chop up your cauliflower into florets and add them to the food processor.
Season them with salt and then blend until rice consistency.
(Dont wanna blend them too long or they will end up like a mash instead!)
2) Transfer to a microwavable bowl and put a cling wrap on. Microwave it for about 4 minutes.
3) Ready to serve.

I served mine alongside my mum's homemade
tau yu bak (braised pork) and some
steamed man tou (buns).
Hmmmm. Yum yum!
Go on, try it! x